
Views: 259 Author: Mia Publish Time: 2026-10-18 Origin: Site
Content Menu
● Choose Your Bobblehead Making Method First
● Step 1: Define the Purpose and Design Brief
● Step 2: Select Reference Photos That Support a Good Likeness
● Step 3: Choose the Material and Production Process
>> Polymer Clay for Hands-On Sculpting
>> Cast Resin for Reproducing a Master
>> 3D Printing for Digital Development
● Step 4: Design the Head, Body, and Base Together
● Step 5: Sculpt or Model the Main Shapes
● Step 6: Plan and Test the Bobble Mechanism
>> Check Alignment and Clearance
>> Avoid Improvised Attachment Assumptions
● Step 7: Cure and Finish Safely
>> Follow Polymer Clay Instructions
>> Treat Uncured Printing Resin Differently
>> Finish Without Restricting Movement
● Step 8: Inspect Likeness, Stability, and Function
● Troubleshooting Common Bobblehead Problems
● Approval Does Not Cover Everything
● Planning Wholesale and Personalized Orders
>> 1. Can I make a bobblehead without a 3D printer?
>> 2. Is 3D printing more accurate than hand sculpting?
>> 3. Can I use one photo for a custom bobblehead?
>> 4. Are personalized bobbleheads suitable for children?
>> 5. How long does custom production take?
Learning how to make your own bobblehead starts with a recognizable design, but a successful result also needs a stable body, a suitable spring connection, and careful finishing. Whether you want one personalized gift or a wholesale collection, the production method should match your budget, quantity, and expectations.
You can sculpt a bobblehead yourself, commission an artist, or work with a manufacturer. Digital modeling and 3D printing provide additional options, but they do not automatically guarantee a better likeness or a functioning bobble mechanism.
My recommendation is to prioritize balance alongside appearance. A beautifully sculpted head is not a finished bobblehead if it leans, catches on the shoulders, or makes the figure unstable.
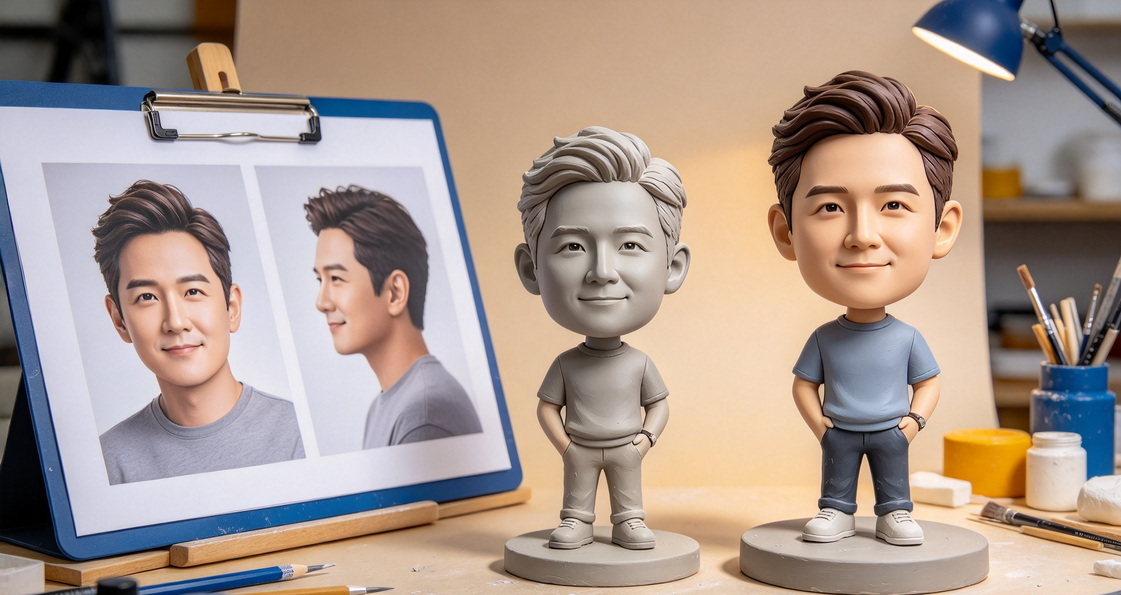
Different production routes solve different problems.
| Method | Useful starting point | Main considerations |
|---|---|---|
| DIY polymer clay | A hands-on personal project | Sculpting skill, curing, assembly, and trial fitting |
| Artist-made figure | A distinctive commissioned gift | Portfolio quality, likeness expectations, and revision terms |
| Digital modeling and printing | A digitally developed design | Modeling quality, print process, finishing, and post-processing |
| Molded resin production | Repeated copies of an approved design | Master approval, molds, finishing consistency, and quantity |
| Hybrid production | Shared bodies with personalized heads | Compatibility, identification, and variation control |
Ask what the finished product actually includes. A printed figurine with a fixed head is not the same as a bobblehead with a moving head.
Start with the recipient, occasion, and intended use.
A retirement gift may emphasize facial resemblance and professional details. An event giveaway may prioritize a recognizable pose and consistent branding.
Record:
- Subject and reference photographs.
- Desired expression and hairstyle.
- Clothing and pose.
- Accessories.
- Overall dimensions.
- Base shape and wording.
- Quantity.
- Required arrival date.
Also specify whether you want a custom head on an existing body or a fully customized figure. This distinction affects development work and pricing.
Confirm that you have the necessary permission to use photographs, logos, and protected character designs.
Provide a clear front-facing photograph and additional views showing the profile, hair, and distinctive features.
Use images with consistent lighting and minimal distortion. Filters, sunglasses, heavy shadows, and wide-angle selfies can obscure useful information.
Identify the details that matter most:
- Face shape.
- Hairline and hairstyle.
- Eyebrow shape.
- Smile or neutral expression.
- Facial hair.
- Glasses.
- Distinctive clothing.
If photographs show different ages or hairstyles, identify the preferred version. Do not expect the sculptor to guess which image should control the result.
Polymer clay can be shaped by hand and cured according to its manufacturer's instructions.
It is a practical option for an individual creative project, but successful results require appropriate construction and curing.
Different products have different instructions. Do not use a universal baking temperature or time simply because another tutorial recommends it.
Cast resin production begins with an approved master and a suitable mold.
This can be useful when several figures share the same shape. However, the master, mold design, formulation, casting, and finishing all influence the result.
"Resin" is not a precise quality specification. Ask what material and manufacturing process the supplier proposes.
Digital modeling can support revisions and repeatable geometry. Printing can produce a master, components, or the figure itself.
However, resemblance still depends on the modeling work and references. Print orientation, supports, surface finishing, and assembly also affect the final appearance.
Some resin printing processes require washing and material-specific post-curing. These requirements are different from curing polymer clay.
The oversized head creates the character, but its dimensions also affect movement and stability.
Before refining facial details, establish:
- Head clearance above the shoulders.
- Space for the spring and its attachments.
- Body pose.
- Base footprint.
- Accessory positions.
- Assembly access.
Keep the first design mechanically simple. Large hats, projecting hair, or oversized props can complicate clearance and balance.
For DIY work, use suitable craft construction methods and materials. Do not assume that increasing head size without changing the mechanism will preserve acceptable movement.
Begin with broad proportions rather than tiny details.
For the head, establish the face outline, forehead, nose, cheeks, and jaw. Check the profile before adding hair texture or glasses.
For the body, confirm posture, clothing volume, and attachment points.
Useful checkpoints include:
1. Does the silhouette match the intended character?
2. Are the head and body proportions intentional?
3. Will the head move without striking nearby details?
4. Can fragile accessories be supported or attached later?
5. Is the base large enough for the proposed arrangement?
Photograph the work from several angles. A design can look convincing from the front while appearing noticeably different in profile.
Use a spring intended for an appropriate craft or bobblehead application. Its suitability depends on the head, mounting arrangement, and desired movement.
Do not choose from overall length alone.
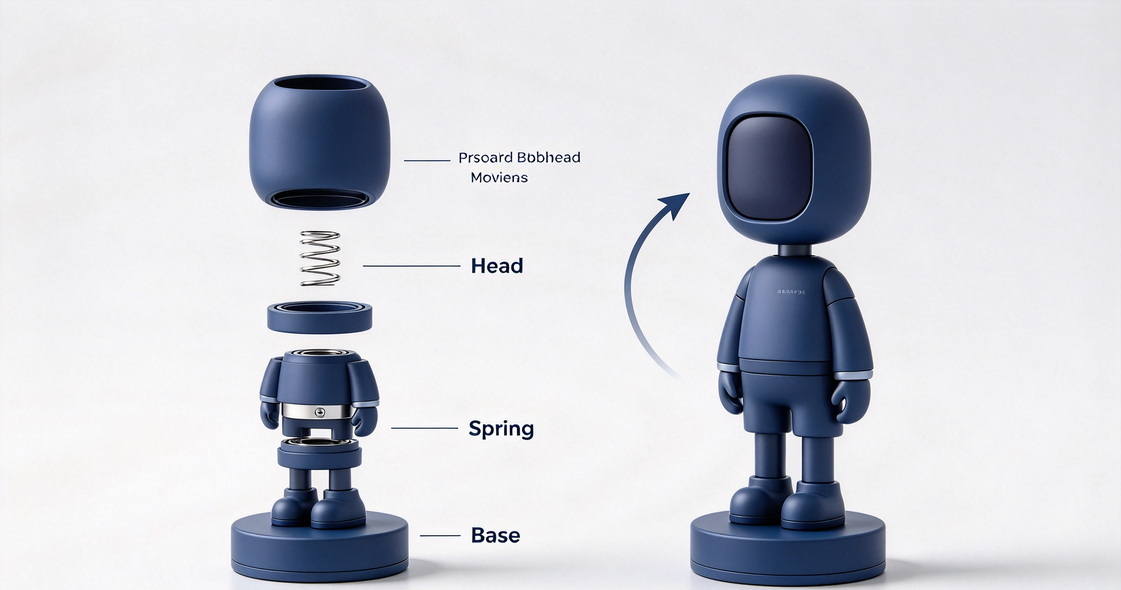
Temporarily fit the head before final bonding.
Inspect whether:
- The head sits near the intended resting position.
- The spring is aligned with the mounting points.
- The head clears the shoulders and accessories.
- The connection remains secure during gentle movement.
- The figure stays stable.
Test the actual assembly. A spring that works with a lightweight trial head may behave differently after hair, paint, and accessories are added.
Select adhesives and joining methods compatible with the cured materials. Follow product instructions for preparation, ventilation, cure time, and handling.
Do not rely on a decorative neck covering to provide structural attachment.
For commercial production, agree on the mechanism and acceptance criteria with the manufacturer rather than specifying an untested spring combination yourself.
Use the temperature, time, and thickness guidance for the exact clay.
Check oven temperature with a suitable thermometer and provide ventilation. Do not microwave polymer clay.
Bake only components and supports known to be compatible with the process. Springs, adhesives, paints, and decorative parts should not be included unless their suitability has been established.
Allow the piece to cool before handling and assembly.
Liquid printing resin and unwashed parts require appropriate handling precautions.
Follow the resin supplier's safety data and process instructions, including suitable gloves, ventilation, washing, and any required post-curing.
Do not apply printing-resin instructions to casting resin, or vice versa.
Check paint and coating compatibility on a sample.
Keep finishes and adhesive away from moving areas unless the design specifically permits them. Recheck the bobble action after finishing.
Use a written checklist rather than judging the figure from one photograph.
| Inspection area | What to review |
|---|---|
| Likeness | Face shape, expression, hairstyle, and approved details |
| Appearance | Paint coverage, visible defects, and correct colors |
| Personalization | Names, dates, numbers, and logos |
| Movement | Clearance, resting position, and unobstructed bobbling |
| Assembly | Secure head connection, accessories, and base |
| Stability | Normal display position on a level surface |
| Packaging | Protection around the head, mechanism, and projecting parts |
For a commissioned order, clarify which issues can be revised at each approval stage.
A digital proof can confirm design details, but it cannot demonstrate the physical spring action.
Check mounting alignment, spring condition, attachment position, and uneven weight distribution.
Do not immediately compensate by bending the spring. Identify the cause before changing the assembly.
Look for shoulder contact, adhesive interference, restricted clearance, or an unsuitable spring–head combination.
A heavier head does not automatically produce better movement.
Review the overall arrangement, base, pose, and projecting accessories.
Correct the design rather than hiding instability with an unsupported display position.
Compare the major proportions before adding more surface detail. Revisit the reference selection, face outline, expression, and profile.
More texture will not necessarily correct the underlying shape.
Buyers often approve a head image and assume they have approved the complete figure.
Separate the approval stages:
- Design concept.
- Head likeness.
- Body and accessories.
- Color and wording.
- Physical movement and assembly.
- Packaging.
Record exactly what each approval means and which changes remain possible afterward.
This is especially important for surprises and time-sensitive gifts. Late changes can affect more than one production stage.
A run of identical figures is different from a collection in which every head is unique.
For bulk projects, create a controlled order sheet linking each person to:
- Reference images.
- Name spelling.
- Body choice.
- Clothing colors.
- Accessories.
- Approval status.
- Packaging identifier.
Request a representative sample and define how variation, defects, and replacements will be handled.
When quoting, separate development, molds where applicable, per-piece production, personalization, packaging, freight, and import-related charges.
Top Arts & Crafts Co., Ltd. is a China-based manufacturer and retailer specializing in resin crafts, polymer-clay custom gifts, and personalized bobbleheads. According to the supplied company brief, it supports international customization, wholesale supply, and export.
Ask the company to confirm the exact materials, proofing process, revision terms, production schedule, and packaging for your order.
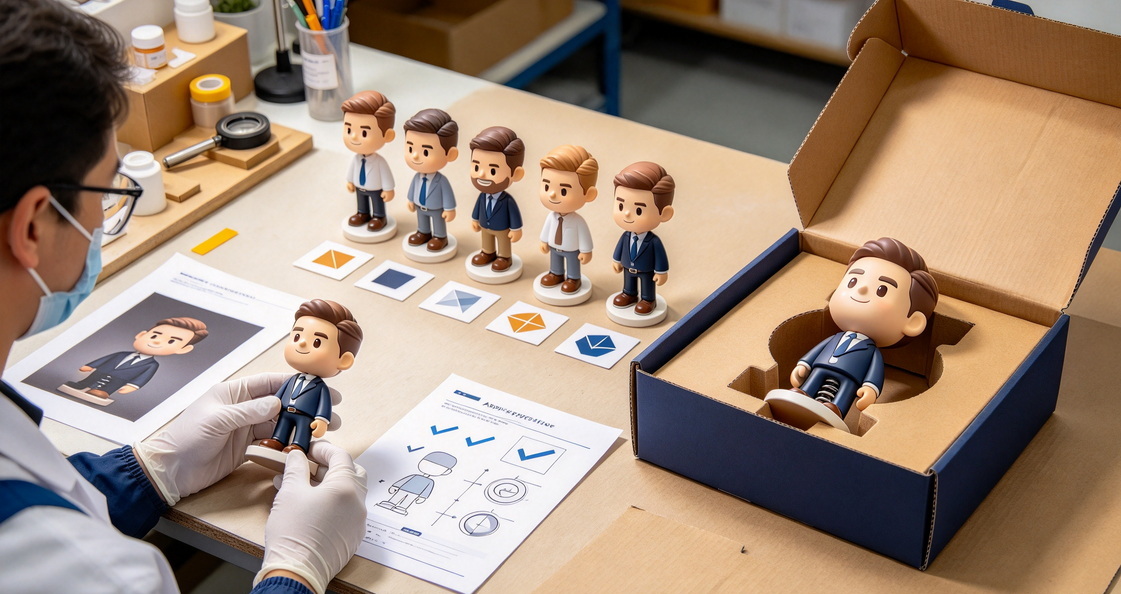
A successful custom bobblehead combines recognizable details with reliable movement, secure construction, and suitable protection.
Choose the production route first, develop the proportions, test the mechanism, and approve the complete result—not just the face.
Yes. Hand sculpting and commissioned artwork are alternatives. The important requirements are a suitable construction method, a functioning mechanism, and appropriate finishing.
Not automatically. Accuracy depends on references, modeling or sculpting skill, process control, and finishing. Review relevant samples rather than choosing by the production label alone.
A supplier may accept one image, but additional views can clarify features that are hidden or distorted. Identify the main reference and preferred expression.
Do not assume so. Springs and detachable accessories can create hazards. In the United States, classification depends on intended use, presentation, and other factors—not merely an "adult collectible" label.
There is no universal timeline. Ask for separate estimates covering proofing, revisions, manufacturing, packing, transit, and potential customs processing. Confirm whether the quoted date means dispatch or arrival.
1. My3DSelfie. "Bobble Your Own Way: A Step-by-Step Guide to Making Your Own Bobblehead." Original article reviewed for design planning, reference selection, accessories, materials, and production-route themes. Unsupported claims of superior accuracy and popularity were not adopted. [my3dselfie]
2. Sculpey. "Frequently Asked Questions." Manufacturer guidance on following product-specific curing instructions, checking oven temperature, providing ventilation, and avoiding microwave curing. [sculpey]
3. Sculpey. "How to Bake Polymer Clay." Supporting guidance on material-specific time and temperature, suitable baking surfaces, test pieces, and cooling. Its example temperatures were not presented as universal instructions. [sculpey]
4. Formlabs. "Resin 3D Printing Safety: Frequently Asked Questions." Technical guidance covering liquid resin handling, gloves, washing, and material-dependent post-curing. This information concerns printing resins, not every casting formulation. [formlabs]
5. Formlabs. "Resin Care" and "Safety With Formlabs SLA Products." Manufacturer guidance on protective equipment, ventilation, solvent handling, and avoiding skin contact with uncured resin. [formlabs]
6. U.S. Consumer Product Safety Commission. "Children's Products." Official explanation of product classification, intended use, marketing, and other factors relevant to determining whether a product is intended for children. [cpsc]
7. U.S. Consumer Product Safety Commission. "Small Parts Ban and Choking Hazard Labeling." Official guidance on small-part hazards and requirements for relevant toys and children's products. [cpsc]


