
Views: 269 Author: Mia Publish Time: 2026-10-17 Origin: Site
Content Menu
● Choose How You Want to Make Your Own Bobblehead
● Step 1: Write a Practical Custom Bobblehead Design Brief
● Step 2: Prepare Reference Photos That Support Likeness
● Step 3: Select Materials and Prepare Your Workspace
>> Polymer Clay for a DIY Bobblehead
>> Resin for Professional or Equipped Workshop Production
● Step 4: Build a Stable Body and Base
● Step 5: Sculpt the Head and Plan the Bobblehead Mechanism
● Step 6: Cure or Produce the Components Correctly
● Step 7: Paint and Add Personalized Details
● Step 8: Assemble and Test the Moving Head
● Troubleshooting Common DIY Bobblehead Problems
● Ordering Custom Bobbleheads Instead of Building Them
● Planning Wholesale Bobbleheads Without Repeating Mistakes
● Turn Your Bobblehead Idea Into a Clear Production Brief
>> 1. Can I make my own bobblehead without a 3D printer?
>> 2. Which material is best for a beginner?
>> 3. Can I use any spring for the head?
>> 4. How much does a custom bobblehead cost?
>> 5. How long does making a bobblehead take?
To make your own bobblehead, you need a clear design, a suitable sculpting or production method, a stable body and base, and a spring-mounted head that moves freely. You can build a DIY bobblehead, commission a sculptor, or order a digitally modeled version. The best route depends on your skills, quantity, budget, and deadline.
My recommendation is to prioritize balance before decorative detail. A recognizable face matters, but a personalized figurine only becomes a successful bobblehead when its head moves without striking the shoulders or tipping the base.
At Top Arts & Crafts Co., Ltd., our business includes personalized bobbleheads, polyresin crafts, and polymer clay custom gifts for individual and wholesale customers worldwide. This guide separates hands-on construction from professional ordering so you can choose an achievable project.
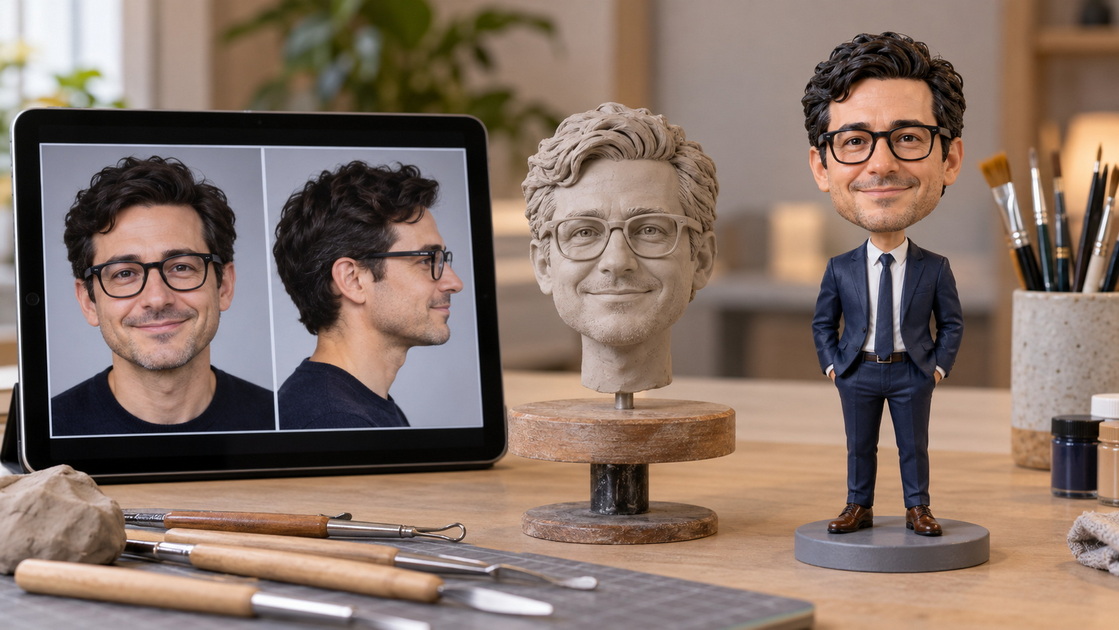
"Making your own" can mean physically sculpting the figure or directing a manufacturer to create your design. These are different workflows.
| Method | Best suited to | Main consideration |
|---|---|---|
| DIY polymer clay | Hands-on, one-off craft projects | Requires sculpting, curing, and assembly |
| Commissioned hand sculpting | Personalized gifts with artistic interpretation | Requires useful photos and clear approvals |
| Digital modeling and 3D printing | Digitally developed custom designs | Requires modeling, printing, finishing, and assembly |
| Molded resin production | Repeated designs and selected wholesale projects | Requires tooling and a quantity-based quotation |
These categories can overlap. A digital model might become a production master, while a resin figure may receive hand-painted details.
Do not assume that 3D printing automatically produces the best likeness. Reference quality, modeling decisions, print quality, and finishing all affect the result. Ask to see examples made through the actual proposed workflow.
Start with the intended recipient and occasion, then translate the idea into a short specification.
Include:
- Subject: a person, couple, pet, or original character.
- Style: playful caricature, restrained stylization, or another agreed treatment.
- Pose: standing, seated, or activity-based.
- Clothing, colors, accessories, and base design.
- Intended display location and approximate dimensions.
- Required quantity and delivery date.
Separate essential details from optional additions. Glasses and a distinctive hairstyle may matter more to recognition than a complicated background.
For commercial projects, confirm that you have permission to use supplied photographs, logos, and protected character designs. A reference image is not automatically authorization to reproduce someone else's work.
Choose sharp, recent photographs with even lighting. Provide a front view, a three-quarter view, and a side view where available.
Avoid mixing images from very different ages or hairstyles unless you explain which appearance to follow. Filters, deep shadows, and wide-angle close-ups can obscure useful facial information.
I recommend adding a short recognition checklist: eyebrow shape, smile, hairline, facial hair, glasses, and other defining features. This makes feedback more actionable than "please make it realistic."
For a pet, include the face, body proportions, and distinctive markings. Keep written notes consistent with the photos.
Oven-bake polymer clay is an option for hand-sculpted projects. Prepare sculpting tools, an appropriate work surface, an oven thermometer, and oven-safe supports compatible with the clay's instructions.
Also plan for a stable base, a suitable bobblehead spring assembly, and an adhesive compatible with the finished materials. Keep craft tools separate from food preparation equipment.
Use the clay manufacturer's directions rather than a universal baking recipe. Different product lines have different curing requirements.
"Resin" describes a broad material category, not one interchangeable formula. Ask which material and production process a supplier proposes.
Liquid casting systems require product-specific handling precautions. Read the technical bulletin and safety data sheet before use, including requirements for ventilation, protective equipment, mixing, and curing.
For an inexperienced maker, commissioning resin production is generally a more practical recommendation than starting an unfamiliar casting process solely for one gift.
Sketch the figure from the front and side before sculpting. Mark the neck position, head clearance, body footprint, and base dimensions.
For a first project, choose a simple pose. Keep accessories close to the body rather than extending long, delicate parts into space.
Build the body and head as separate components so the head can move independently. Any internal supports must suit the material, curing process, and finished design.
Check the base on a flat surface. It should support the intended figure without rocking. Do not leave stability testing until after painting and permanent assembly.
Develop the main head shape before adding fine details. Compare the brow, cheeks, nose, mouth, and hairstyle against the same reference set throughout the process.
Leave appropriate space for the mounting arrangement. Avoid assuming that any spring will work with any head.
The head's mass, mounting position, spring behavior, and clearance must work together. A heavy head on an unsuitable spring can lean or move poorly; insufficient clearance can cause contact with the collar or shoulders.
For beginners, I recommend a purpose-made bobblehead mechanism rather than improvised spring winding. Follow its supplier's fitting instructions and test the planned combination before committing to the finished sculpt.
For polymer clay, follow the exact package instructions for temperature, duration, and thickness. Preheat the oven and verify its temperature with a separate oven thermometer.
Use an approved oven-safe surface and provide ventilation as directed. Do not microwave polymer clay or exceed the manufacturer's recommended conditions.
Allow components to cool before further work. Do not bake a spring assembly, glue, paint, or other addition unless its manufacturer explicitly confirms compatibility with that process.
For professionally cast or printed components, ask whether required curing and finishing steps are complete before assembly. Processes differ, so instructions for one resin or printing system should not be transferred to another.
Test paint and any protective finish on a sample of the same material. Check adhesion, appearance, and compatibility before coating the figure.
Work from larger color areas to smaller details. Add eyes, eyebrows, clothing features, and accessories carefully, allowing the coatings to dry according to their instructions.
Check names, dates, and short messages against typed text. A beautiful figurine with an incorrect inscription is still an unsuccessful personalized gift.
For logos, supply an authorized artwork file and an agreed color reference. A screen image alone does not establish an exact physical color match.
Dry-fit the mechanism according to its instructions before permanent attachment. Keep adhesive away from moving coils and use only a compatible bonding product.
After the adhesive has reached its specified cure, place the figure on a level surface and gently move the head.
Check that:
1. The head rests in the intended position.
2. It moves without hitting clothing or accessories.
3. The mounting points remain secure.
4. The base stays stable during normal gentle movement.
5. The finish has no visible cracks or interference marks.
These are practical inspection checks, not a substitute for formal product testing. Do not promise a fixed number of movements or lifespan without supporting evidence.

| Problem | What to inspect | Practical response |
|---|---|---|
| Head leans noticeably | Mounting alignment and head mass | Reassess the fit before bonding |
| Head barely moves | Obstruction, adhesive, or unsuitable mechanism | Check clearance and mechanism suitability |
| Head hits shoulders | Neck position and available clearance | Revise the geometry before finishing |
| Figure tips easily | Base footprint and overall weight distribution | Redesign or enlarge the supporting base |
| Likeness feels weak | Reference consistency and defining features | Correct major shapes before tiny details |
Do not force the spring to compensate for an unsuitable design. If parts are already bonded, seek advice before disassembly to avoid additional damage.
If your goal is a finished gift rather than a craft project, professional customization may be the better route.
Ask the supplier to explain:
- Which components are individually customized.
- Whether the body is a standard design or fully custom.
- Which sculpting and painting proofs are provided.
- When revisions must be requested.
- What the quotation includes.
- How damage or customization discrepancies are handled.
Approve sculpting, painting, and inscription details at the relevant stages. A sculpting preview does not necessarily show the final colors, and a mockup is not always equivalent to a finished sample.
For deadlines, separate design approval, production, dispatch, and transportation. Avoid relying on a delivery promise that does not account for revisions.
Bulk projects need a controlled specification, not simply more photographs.
Create one master list linking each recipient ID to reference images, clothing, accessories, inscription, approved proof, and delivery requirements. Assign one person to approve changes.
Clarify whether the project involves repeated copies of one design or many unique figures. Tooling, customization work, and unit pricing can differ substantially.
Before authorizing production, discuss a representative sample, inspection expectations, and packaging that protects the head and delicate accessories. Confirm how figures will be matched to recipient labels.
Request a written quotation covering quantity, customization scope, sample charges, packaging, shipping, and responsibility for import-related costs. Do not assume a lower unit price means a lower total project cost.
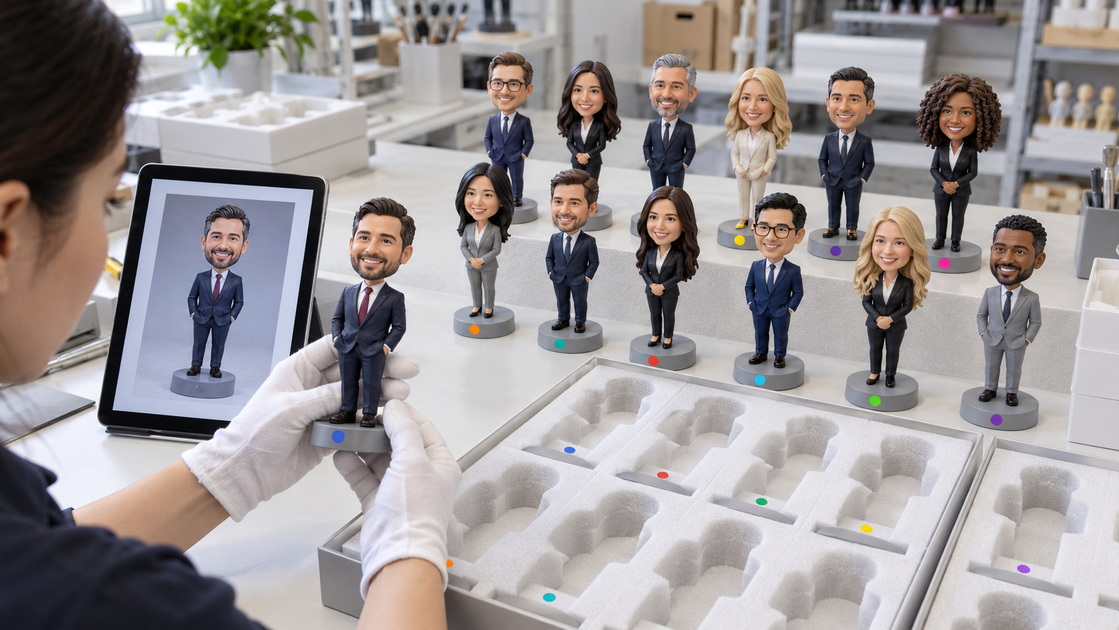
A successful custom bobblehead combines recognizable features, thoughtful construction, a working mechanism, and accurate personalization.
Whether you sculpt it yourself or commission production, settle the design and approval process before focusing on decorative extras.
Yes. You can hand-sculpt a polymer clay figure and use a suitable spring mechanism, or commission a manufacturer. A printer is only necessary for a workflow that specifically uses printing.
For a hands-on project, polymer clay is worth considering because it supports direct sculpting. Follow its handling and curing instructions. Resin casting requires a separate set of equipment and precautions.
No universal spring specification suits every figure. Choose a mechanism appropriate to the head and mounting arrangement, then test alignment, clearance, movement, and stability.
Request a quotation based on size, material, design complexity, quantity, proofing, packaging, and shipping. Generic price ranges can mislead when they compare substantially different products.
Timing depends on the method, skill level, revisions, curing, assembly, and delivery requirements. Obtain a project-specific schedule rather than treating a simple craft demonstration as a production commitment.
1. My3DSelfie. "Bobble Your Own Way: A Step-by-Step Guide to Making Your Own Bobblehead." Original article reviewed for its design-planning questions, accessory suggestions, material discussion, and comparison of DIY, commissioned, and printed approaches. The retrieved article did not include visible customer comments. Its claims of superior printing accuracy and popularity were not adopted as established facts. [my3dselfie]
2. Sculpey. "Frequently Asked Questions." Manufacturer guidance supporting product-specific curing instructions, oven thermometers, suitable baking surfaces, ventilation, and the prohibition on microwave curing. [sculpey]
3. Sculpey. "Common Polymer Clay Questions." Additional manufacturer guidance on test pieces, oven-temperature verification, curing according to clay type and thickness, and cooling before handling. [sculpey]
4. Smooth-On. "Are These Materials Safe to Use?" Manufacturer guidance supporting the need to read technical bulletins and safety data sheets and use appropriate workspace ventilation and protective equipment for casting materials. [smooth-on]
5. Smooth-On. "Smooth-Cast 320 Product Information." A product-specific example illustrating why resin preparation, ventilation, moisture sensitivity, protective equipment, and curing requirements cannot be generalized across all casting systems. This source does not establish that Top Arts & Crafts uses this formulation. [smooth-on]
6. TACC. "How to Make a Bobblehead Spring?" Supplementary industry material linking spring selection to head size and weight. The available search extract informed the general mechanism discussion; no universal wire diameter, spring specification, or performance guarantee is asserted. [wowcustombobbleheads]


